
Gravity Forms is a powerful, highly customisable forms plugin for WordPress that we love here at WPMaintain. We use it on this website (see it in action on our Contact Page), and recommend it to all our clients. It’s one of our recommended WordPress tools too. Packed with features that go well beyond a basic contact form, it gives WordPress users complete control over their forms and the data that they collect.
The drag-and-drop interface will have you building forms quickly and easily, and with over 30 standard fields to choose from you’ll be able to create any form you can imagine. Gravity Forms even includes add-ons that allow you to create things like polls, surveys, and quizzes, along with all of the other more typical types of forms.
With all of these fields and available options, it’s possible to create some fairly complex forms. Gravity Forms has you covered — it even includes a “save and continue later” feature that allows your visitors to save their progress if they get interrupted so they can come back and complete the form later, which is useful for longer forms like application forms of reference forms which is how some of our clients use Gravity Forms on their website.

With all of this power behind it, you might think Gravity Forms is overly complicated to use. Yet it maintains its user-friendliness, even for beginners.
Here’s a quick guide to help get you started.
How To Install Gravity Forms
First, you’ll need to purchase a license key from the Gravity Forms website. You’ll need to create an account, purchase the plugin, and download it all from the site.
The easiest way for most users to install the Gravity Forms plugin is through the WordPress dashboard, just like you’ve likely installed other plugins. From the admin dashboard, find Plugins on the left panel and click Add New. Then click Upload Plugin and Browse to the zip file you downloaded from the Gravity Forms site. Select the file and Install Now. Once installed, don’t forget to Activate Plugin.
From your Gravity Forms account page on their site, click Licenses, and copy your license key. Back on your WordPress admin dashboard, find Forms -> Settings. In General Settings, find Support License Key and paste in your license key. Make sure to hit save. You should see a green checkmark next to the license key field. If you don’t, try copying and pasting again, check for errors, and finally, contact support if all else fails.
How To Create a Simple Enquiry Form Using Gravity Form
If you’re logged into your WordPress website, you’ll see a Forms menu on the left panel. Click New Form, and fill out the box that appears with your form title and description. Don’t worry, you can always change this later.
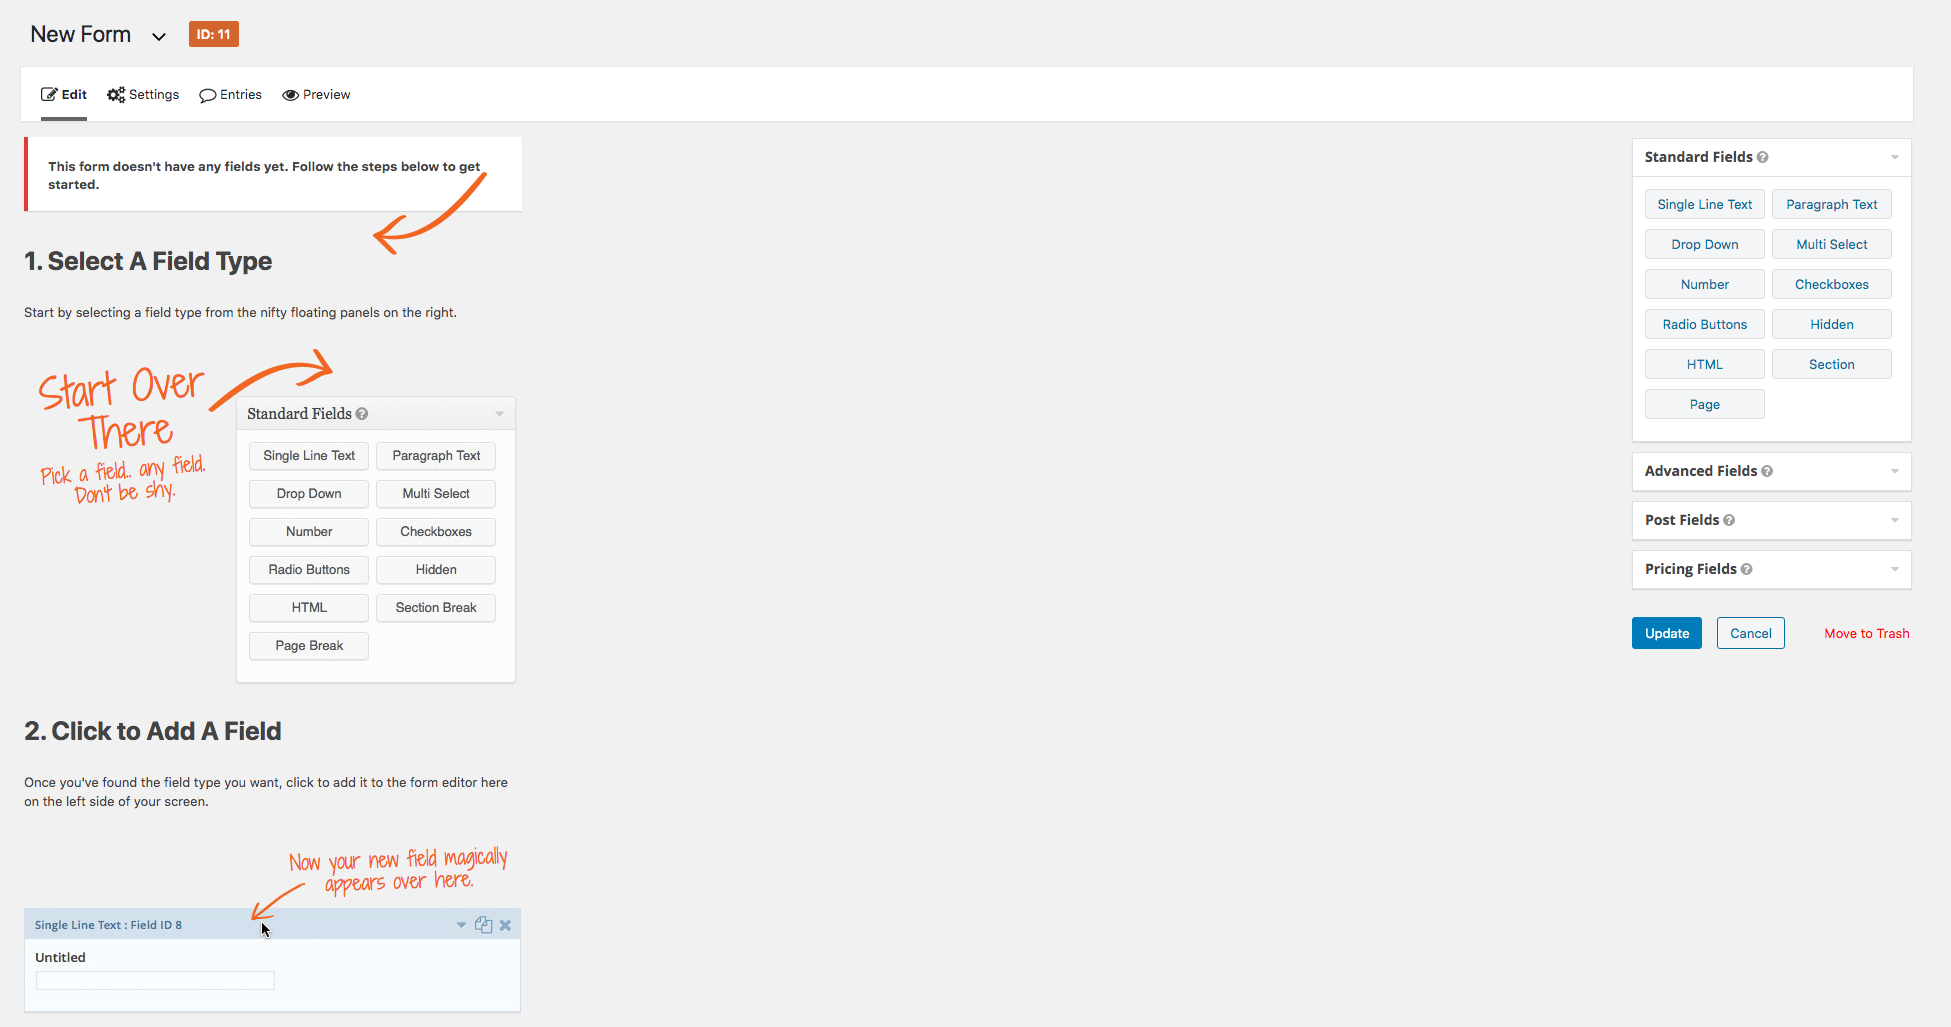
Now you’re ready to select the fields that you want to add to your form. There are four field types to choose from.
- Standard Fields — basic fields that can be customised to suit exactly what you need, i.e. single line text that you can use for any type of form field. Check the Advanced Fields too, to see if there’s a pre-defined field there that gives you what you need. If not, customise one of these Standard Fields to suit.
- Advanced Fields — these have a specific purpose to them, like name, address, etc. Some of these are actually multiple fields in one. If you can find what you need here, you won’t need to customise a Standard Field.
- Post Fields — these fields allow you to capture the information required to create a draft post on your WordPress site. This enables easy guest posting and user-created content. Don’t worry, nothing here will be published unless you specifically set it to do so, or until you’ve manually published the post.
- Pricing Fields — use these to create services or products available for purchase, which users can pay for using an add-on for Stripe, PayPal or another payment gateway that plugs directly into Gravity Forms.
Simply click on the fields you would like to add to your form. Once added, you can drag and drop until you get them in the order you want. To edit a field, hover over it and click Edit. You’ll be able to customise to your heart’s content.
Once you’re done, make sure to save your work by clicking Update at the bottom of the page.

Importing and Exporting Gravity Forms
You might create a form that you’d like to use across multiple sites. Gravity Forms makes this easy with the importing and exporting features.
First, you’ll export the form that you want to use elsewhere. From the admin dashboard within WordPress, hover over Forms on the left panel and select Import/Export. Click on Export Forms and then select the appropriate form(s). Select Save File and click OK to create a JSON file with all of the information you need. Make note of where you’ve saved this file.
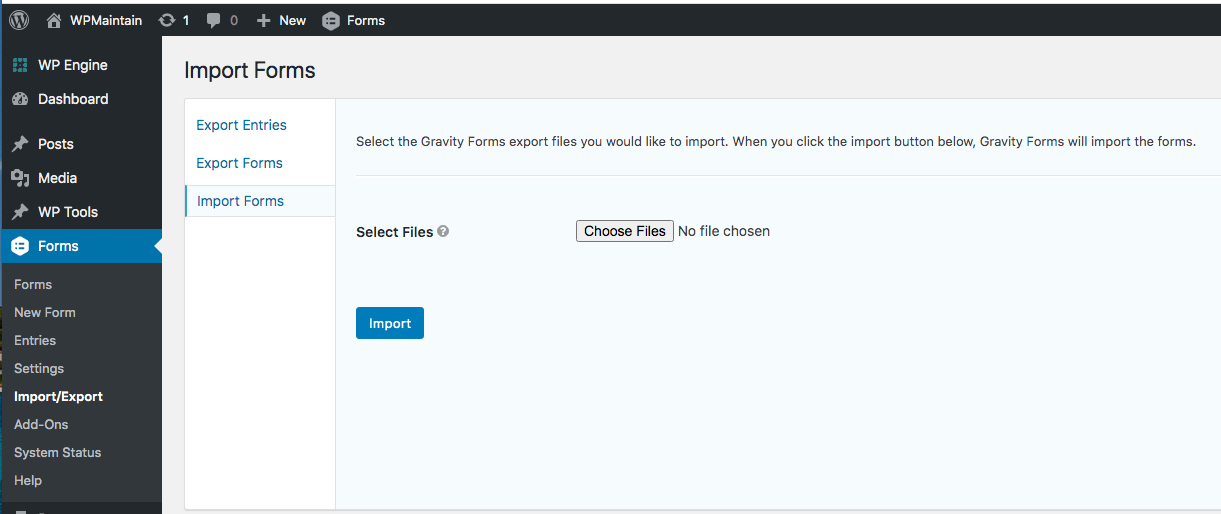
Next, you’ll import the JSON file and use it for the form in the new location. From the new site’s admin dashboard, again hover over Forms and select Import/Export. Click on Import Forms, Browse to the appropriate JSON file, and click Import. It really is that easy!
How To Add a Gravity Form to Your Pages
Once you’ve created or imported a form, you still need to embed it into your site. There are multiple ways to do this, but if you’re a relative beginner and using the latest version of WordPress, the most straightforward method will be to use the Gravity Forms block.
From within the page editor, add a new block by clicking the plus sign. Type gravity in the search field, and then under Embeds click on Form. Click Select a Form and pick the form you want.
If you’re interested in the other available methods of adding a Gravity Form, click here.
That’s It!
You’ve done it! Congratulations — this is all you need to know to create a simple Gravity Form and insert it into a page on your WordPress site.
But we’ve only scratched the surface here. Gravity Forms has so many available options and features, you can just about capture any type of information from your visitors in any format you’d like. To explore all of these features, check out the full features list on the official Gravity Forms website.